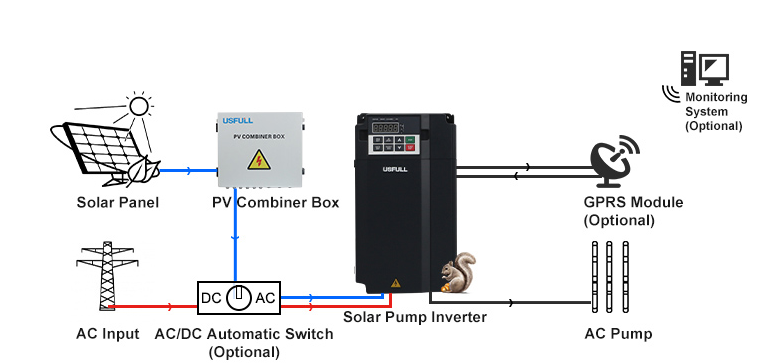
Connexion d'un convertisseur de pompe solaire, également connu sous le nom de VFD solaire ou Inverseur de pompe à eau solaire, à un boîte de raccordement est une étape cruciale dans la mise en place de systèmes d'énergie solaire et d'autres applications nécessitant un contrôle précis des moteurs électriques. Le processus implique plusieurs considérations clés, depuis la compréhension des fonctions de chaque composant jusqu'à la garantie d'une installation et d'une connexion correctes. Cet article vous guidera tout au long du processus, en abordant des sujets importants tels que les fonctions du Solar Pump Inverter et du boîtier de couplage, les vérifications préalables à l'installation, les méthodes d'installation et le débogage.
Fonctions de Inverseur de pompe solaire et boîte combinée
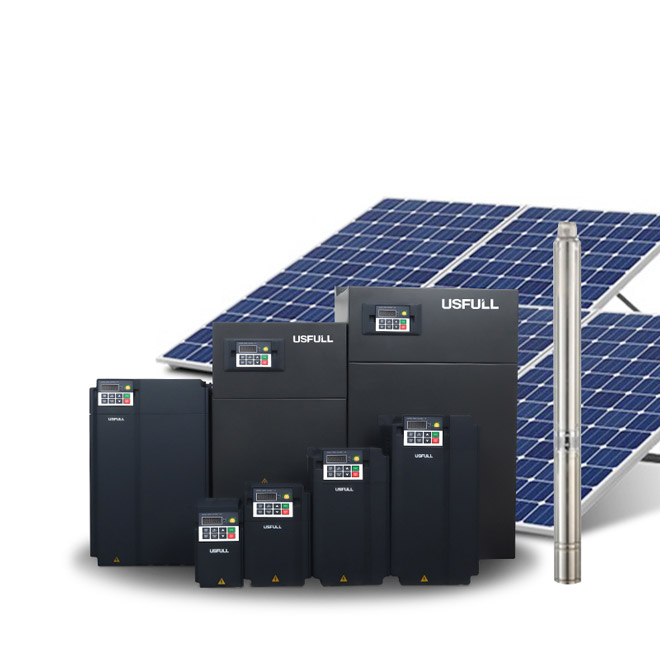
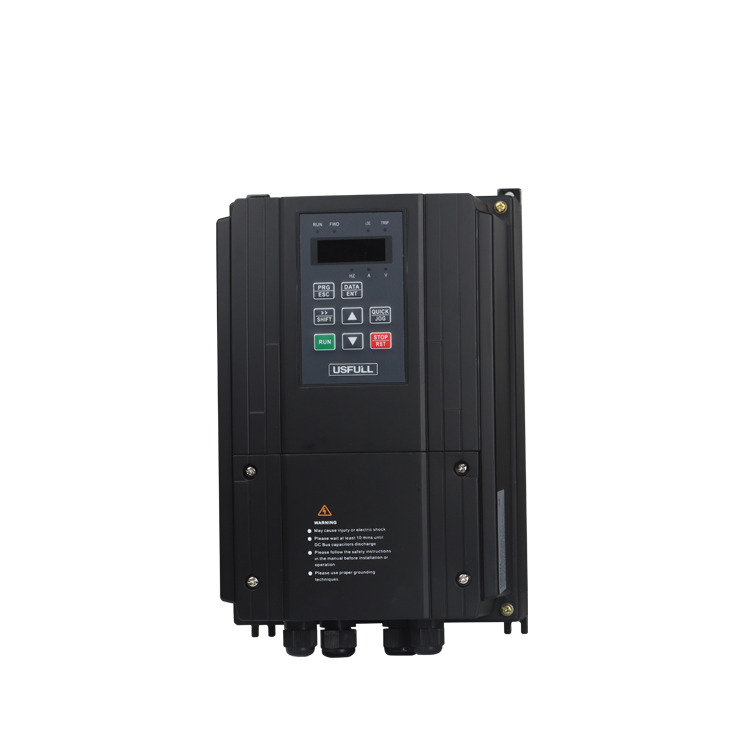
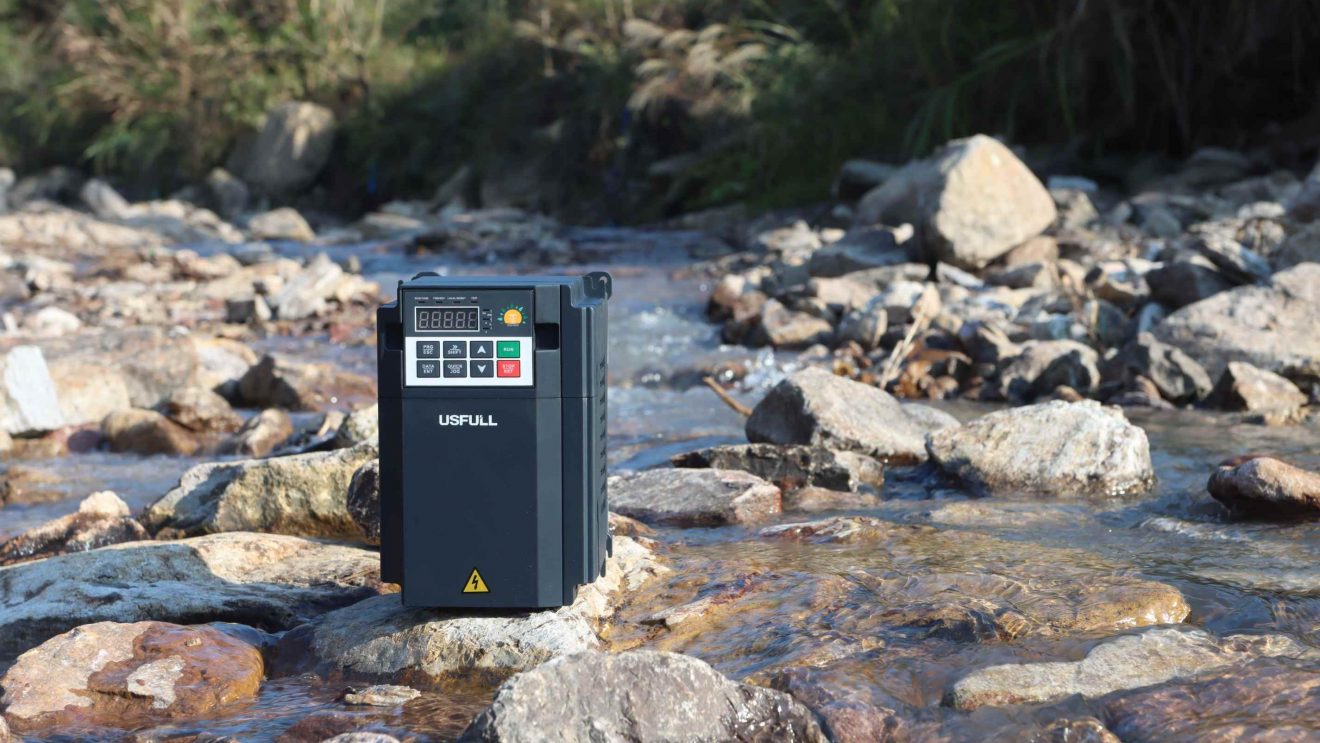
Inverseur de pompe solaire
A convertisseur de pompe solaire est le pont entre une centrale solaire et le système électrique, et remplit plusieurs fonctions essentielles :
- Conversion d'énergie : Convertit efficacement le courant continu généré par les panneaux solaires en courant alternatif.
- Suivi du point de puissance maximale (MPPT) : Ajuste automatiquement les conditions de fonctionnement pour garantir que les panneaux solaires fonctionnent à leur point de puissance maximale, maximisant ainsi la production d'énergie.
- Surveillance intelligente : Surveille les performances du système en temps réel, y compris la tension, le courant et la puissance, ce qui permet une surveillance à distance et un diagnostic des défaillances.
- Caractéristiques de protection : Comprend de multiples fonctions de protection telles que la protection contre les courts-circuits, les surcharges et l'îlotage afin de garantir un fonctionnement sûr et stable.
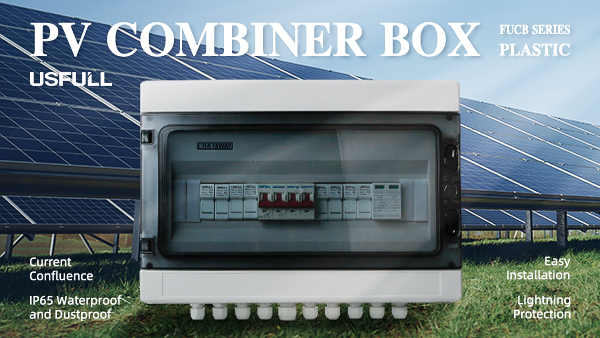
Boîte de raccordement
A boîte de raccordement dans les systèmes solaires photovoltaïques regroupe plusieurs entrées de courant continu provenant des panneaux solaires en une seule sortie de courant continu. Cette sortie est ensuite introduite dans un onduleur, qui la convertit en courant alternatif pour l'utiliser dans le réseau ou les systèmes électriques. Les principales fonctions d'une boîte de raccordement sont les suivantes
- Protection des circuits :Comprend des fusibles ou des disjoncteurs pour protéger contre les surintensités et les courts-circuits.
- Câblage simplifié :Réduit la complexité du câblage en consolidant plusieurs entrées en une seule sortie.
- Suivi et maintenance :Souvent équipés de dispositifs de surveillance pour contrôler les performances du système et simplifier les tâches d'entretien.
Comment vérifier l'onduleur et le répartiteur avant l'installation?
Inspection de l'onduleur de la pompe solaire et du boîtier de raccordement
Inspection de l'équipement :
- Vérifiez que l'onduleur, le boîtier de raccordement et les accessoires (câbles, connecteurs, supports de montage) ne sont pas endommagés.
- Vérifier que les clés, les certificats, les cartes de garantie et les manuels d'utilisation sont complets et que les spécifications sont conformes aux exigences de conception.
Inspection environnementale :
- Évaluer les conditions du site d'installation, y compris la température, l'humidité et la vitesse du vent, pour s'assurer qu'elles répondent aux exigences de l'équipement.
Vérification du dessin :
- Vérifier l'exactitude des emplacements d'installation et des chemins de câblage en se référant aux plans de construction.
Quelles sont les méthodes d'installation de l'onduleur et du coffret de raccordement ?
Les méthodes d'installation des convertisseurs et des combinateurs pour pompes à eau solaires peuvent varier en fonction des conditions du site et des caractéristiques de l'équipement. Les méthodes les plus courantes sont les suivantes :
Inverseur de pompe solaire Installation
Installation murale :
- Convient aux murs plats et solides, à l'intérieur comme à l'extérieur.
- Veillez à la stabilité du mur et utilisez des chevilles à expansion ou des chevilles chimiques pour une installation sûre du support.
Installation sur poteau :
- Applicable lorsque des poteaux ou des supports appropriés sont disponibles.
- Vérifiez que les poteaux sont conformes aux exigences de diamètre, de hauteur et de charge, et utilisez des pinces spécialisées pour fixer l'onduleur.
Installation au sol :
- Convient pour les surfaces planes avec beaucoup d'espace.
- Installez une fondation ou une base pour assurer la stabilité.
Installation de la boîte de raccordement
Installation murale :
- Idéal pour les agencements compacts et l'accès pratique à plusieurs chaînes de panneaux.
- Fixer solidement la boîte à l'aide du matériel approprié.
Installation sur poteau :
- S'assurer que les poteaux répondent aux exigences de résistance et utiliser des pinces et des supports pour le montage.
Installation au sol :
- Placez-les sur une base ou une plate-forme stable pour en faciliter l'accès et les protéger des facteurs environnementaux.
Précautions d'installation
Les précautions suivantes à prendre lors de l'installation permettent de garantir la sécurité et les performances de l'équipement :
- Protection contre l'humidité :Évitez d'installer les onduleurs et les boîtes de raccordement dans des endroits humides ou exposés à l'eau.
- Protection contre le soleil et la chaleur :Protéger l'équipement de la lumière directe du soleil et des températures élevées pour éviter la surchauffe.
- Vérification du support de charge :Vérifiez que les murs, les poteaux ou les sols peuvent supporter le poids de l'équipement.
Considérations météorologiques : Éviter l'installation par temps de pluie ou de neige afin d'éviter les dommages causés par l'eau et de garantir la qualité de l'installation.
Sortie Wiring Mméthode
Un câblage correct des prises est essentiel pour garantir l'intégrité électrique et la sécurité du système :
Dénudage de câbles :
- Utilisez des pinces à dénuder ou des lames pour retirer l'isolation extérieure, en veillant à ne pas endommager l'isolation intérieure ou les conducteurs.
Installation du presse-étoupe étanche :
- Installer les presse-étoupes étanches immédiatement après avoir dénudé le câble. Choisir des presse-étoupes qui correspondent aux spécifications du câble et qui garantissent une installation sûre et étanche.
Fixation du câble :
- Fixez les câbles avant de les connecter à l'onduleur ou à la boîte de raccordement afin d'éviter qu'ils ne bougent ou ne s'affaissent.
- Choisissez des points sûrs le long du parcours des câbles et utilisez des colliers de serrage ou des attaches pour fixer les câbles en place, en évitant toute tension excessive.

Comment connecter le convertisseur de pompe solaire à la boîte combinée?
Pour connecter l'onduleur de la pompe solaire à la boîte de raccordement, procédez comme suit :
Préparer les câbles :
- Choisir des câbles dont la tension et l'intensité sont appropriées.
- Dénuder l'isolation des extrémités du câble et fixer les connecteurs appropriés.
Raccordement des produits à courant continu:
- Le pôle "+" de chaque panneau solaire est connecté au pôle "+" des fusibles dans la boîte de raccordement.
- Le pôle "-" de chaque panneau solaire est connecté au pôle "-" des fusibles dans la boîte de raccordement.
- Connectez le câble du panneau solaire au disjoncteur CC.Le disjoncteur CC USFULL est non polaire.Vous pouvez utiliser le pôle gauche comme + et le pôle droit comme -.L'entrée du panneau solaire se trouve sur le côté inférieur du disjoncteur.
- Les pôles "+" et "-" du disjoncteur CC sont connectés à l'onduleur.
Connexions sécurisées :
- Serrer tous les raccords pour éviter qu'ils ne se desserrent sous l'effet des vibrations ou de la dilatation thermique.
- Utilisez des serre-câbles ou des pinces pour organiser et fixer les câbles.
Vérifier les connexions :
- Vérifier à nouveau l'exactitude et la sécurité de toutes les connexions.
- S'assurer qu'il n'y a pas de fils errants ou de connexions lâches.
Comment déboguer et accepter ?
Après l'installation, le débogage et les tests d'acceptation sont essentiels pour s'assurer que le système fonctionne correctement :
Mise sous tension initiale :
- Mettez le système sous tension et observez la séquence de démarrage de l'onduleur.
- Vérifiez la présence de codes d'erreur ou d'avertissements sur le panneau d'affichage de l'onduleur.
Tests fonctionnels :
- Testez le fonctionnement du moteur en faisant varier la vitesse et en observant les performances.
- S'assurer que l'onduleur répond correctement aux signaux de commande.
Surveillance et enregistrement :
- Utiliser des outils de surveillance pour enregistrer les performances du système et identifier les problèmes potentiels.
- Vérifier les écarts de tension, de courant et de fréquence.
Critères d'acceptation :
- Vérifier que le système répond à tous les critères de performance et de sécurité.
- Procéder à une inspection finale et obtenir l'approbation des parties prenantes concernées.
En conclusion, le lien entre un entraînement de la pompe solaire et un boîte de raccordement est un aspect essentiel de l'installation d'un système solaire photovoltaïque. En suivant ces lignes directrices et en comprenant les fonctions et les méthodes d'installation de chaque composant, vous pouvez garantir une installation fiable et efficace. Un entretien et une surveillance réguliers sont essentiels pour assurer la performance et la sécurité à long terme.